How To Access Raspberry Pi With Public IP: A Beginner's Guide For The Tech-Savvy
Accessing your Raspberry Pi with a public IP might sound like a daunting task, but trust me, it's easier than you think. In today's interconnected world, being able to remotely access your Pi opens up a world of possibilities. Whether you're managing a home server, controlling IoT devices, or just tinkering with your setup, knowing how to connect to your Pi from anywhere is a game-changer. So, buckle up because we're about to dive deep into this tech-savvy adventure!
Imagine this: you're chilling at a café, sipping on your favorite latte, and suddenly you need to check something on your home network. With the right setup, you can connect to your Raspberry Pi as if you're sitting right next to it. Sounds cool, right? This guide will walk you through the steps, tips, and tricks to make it happen. We'll cover everything from setting up your Pi to securing your connection.
Now, let's be real here—security is a big deal when you're exposing your Pi to the internet. But don't worry; we've got your back. We'll make sure you're not just connecting but doing it safely. So, whether you're a seasoned pro or just starting out, this guide is packed with all the info you need to access Raspberry Pi with public IP like a boss.
- Filmyfly Com Online 2025 Your Ultimate Guide To Stream Movies Legally
- Unveiling The World Of Filmyfly Your Ultimate Movie Destination
Why Access Raspberry Pi with Public IP?
First things first, why would you even want to access your Raspberry Pi using a public IP? Well, my friend, the reasons are plenty. For starters, it gives you the freedom to control your Pi from anywhere in the world. Whether you're troubleshooting a server issue, monitoring your home security cameras, or managing your IoT devices, having remote access is a must-have skill in today's tech-driven world.
Plus, it's not just about convenience. Accessing your Pi via public IP can also enhance productivity. Imagine being able to work on your projects without being tied down to a specific location. It's like having your own personal server that you can tap into whenever you need it.
Key Benefits of Using Public IP for Raspberry Pi
- Remote Access: Control your Pi from anywhere in the world.
- Increased Productivity: Work on your projects on the go.
- Enhanced Security: With the right setup, you can ensure your data stays safe.
- Cost-Effective: No need for expensive cloud services when you can use your own Pi.
Understanding Public IP and Raspberry Pi
Before we dive into the nitty-gritty, let's break down what public IP means and how it relates to your Raspberry Pi. A public IP address is like your Pi's street address on the internet. It allows other devices on the internet to find and connect to your Pi. Pretty cool, huh?
- Why Ullu Online Is The Goto Platform For Bingewatching
- Www Fry99 Com Your Ultimate Guide To Discovering The Best Online Entertainment
However, it's not as simple as just slapping an IP address on your Pi and calling it a day. There are a few things you need to consider, like port forwarding, firewalls, and security protocols. But don't sweat it—we'll cover all of that in the next sections.
What Makes Public IP Different from Private IP?
Think of private IP as the address within your local network. It's like your house number within your neighborhood. On the other hand, public IP is your street address that anyone on the internet can use to find you. When you're accessing Raspberry Pi with public IP, you're essentially giving it a global address.
Setting Up Your Raspberry Pi for Public IP Access
Now that you understand the basics, let's get down to business. Setting up your Raspberry Pi for public IP access involves a few key steps. We'll walk you through each one so you can set it up like a pro.
Step 1: Update Your Raspberry Pi
First things first, make sure your Pi is up to date. You don't want to run into any issues because of outdated software. Open your terminal and run the following commands:
sudo apt-get update
sudo apt-get upgrade
These commands will ensure your Pi is running the latest software versions, which is crucial for security and performance.
Step 2: Enable SSH
SSH, or Secure Shell, is the protocol you'll use to connect to your Pi remotely. To enable SSH, go to the Raspberry Pi Configuration tool and enable the SSH option. You can also enable it via the command line by running:
sudo systemctl enable ssh
sudo systemctl start ssh
Once SSH is enabled, you're ready to move on to the next step.
Configuring Your Router for Public IP Access
Your router plays a crucial role in allowing public IP access to your Raspberry Pi. You'll need to configure port forwarding to direct incoming traffic to your Pi. Here's how you can do it:
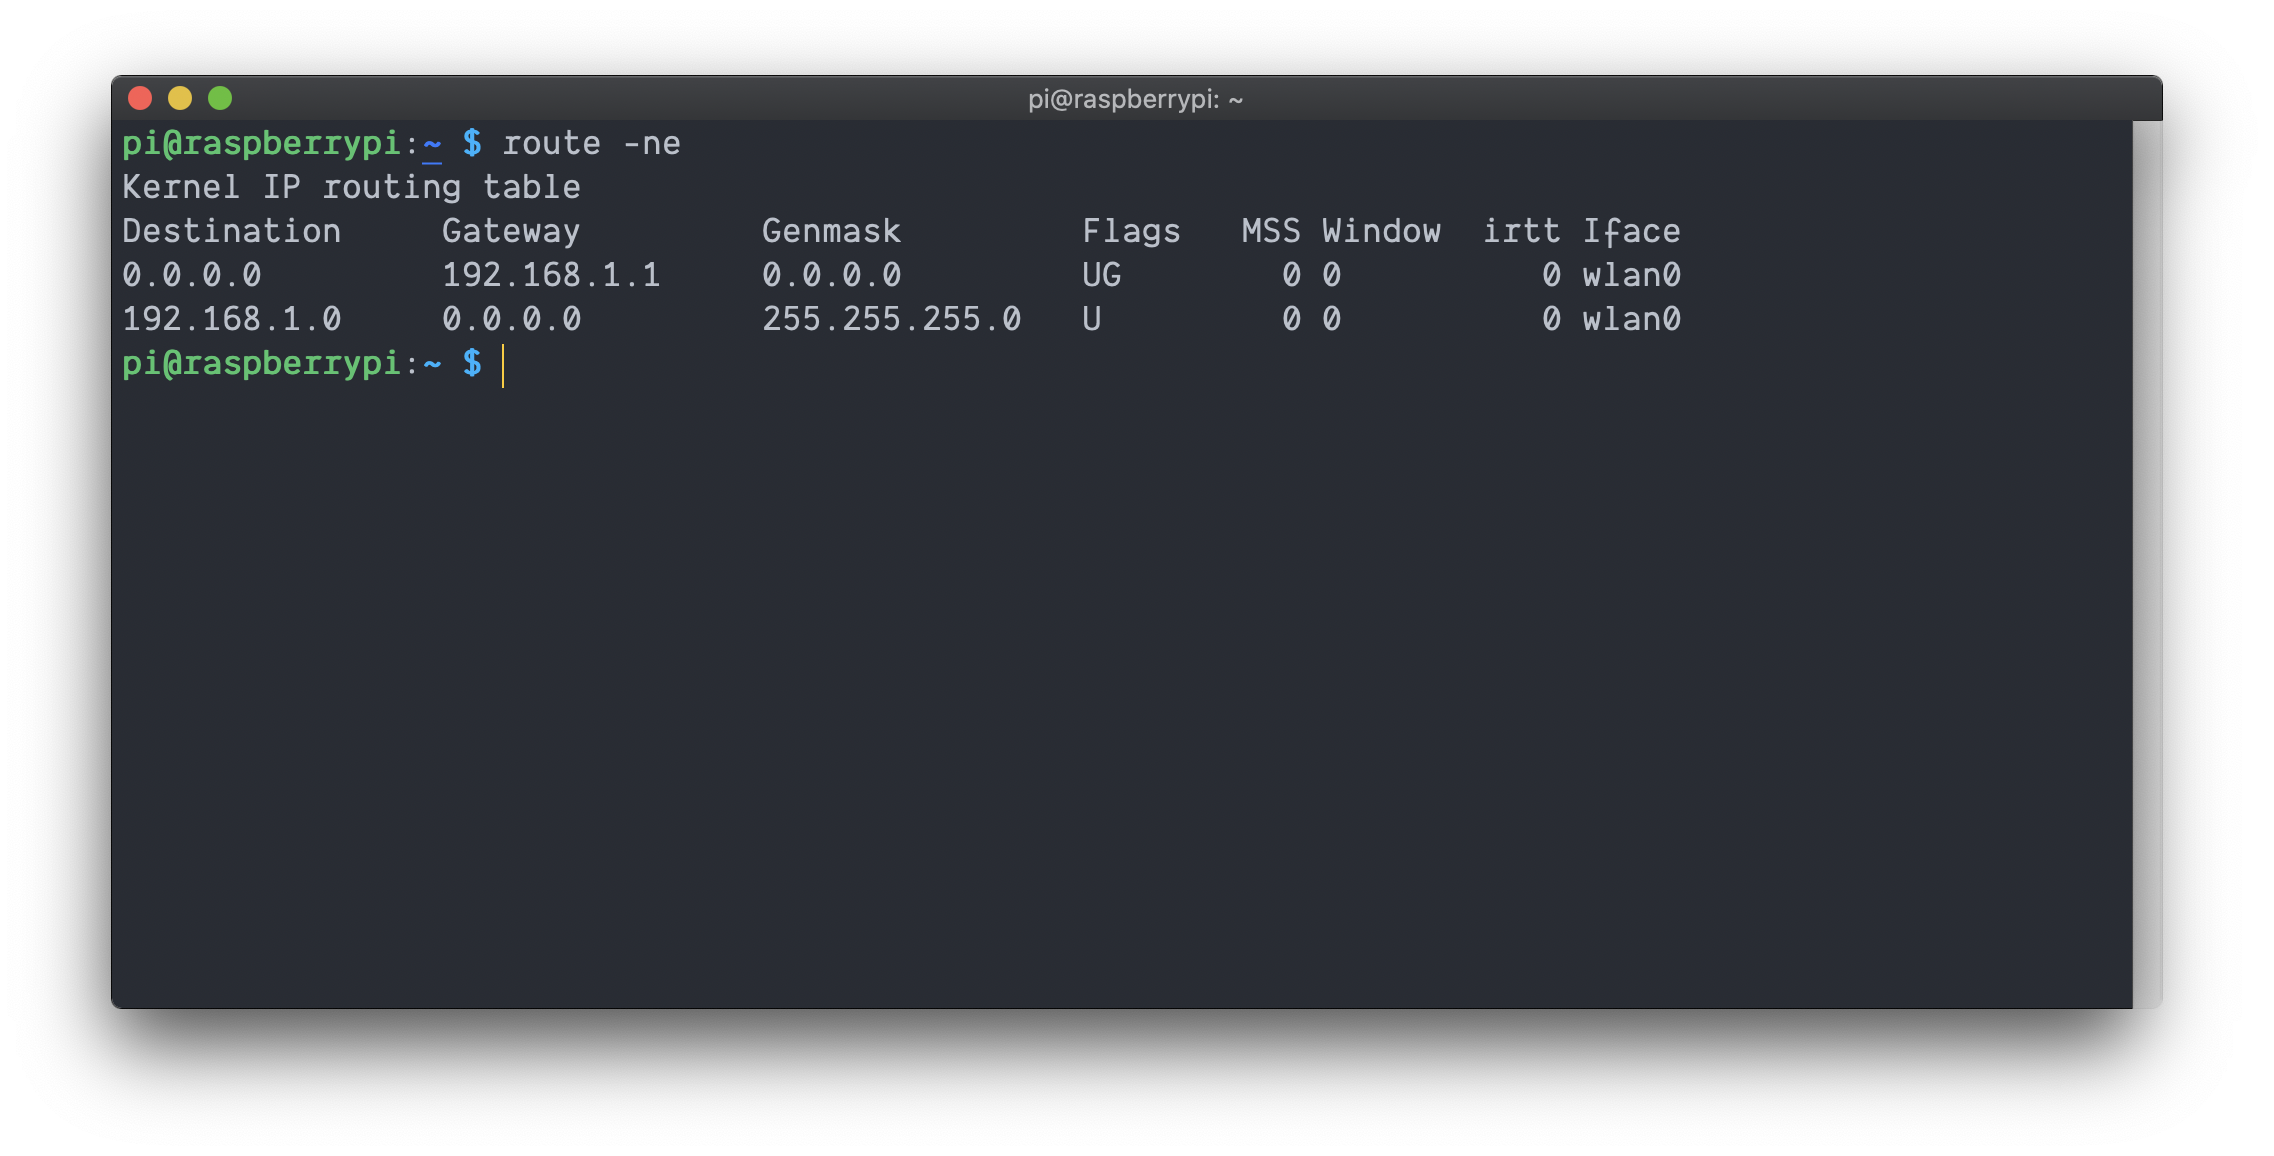
Step 1: Find Your Pi's Local IP Address
Before you can set up port forwarding, you need to know your Pi's local IP address. You can find this by running the following command in your terminal:
hostname -I
This will display your Pi's local IP address, which you'll need for the next step.
Step 2: Set Up Port Forwarding
Log in to your router's admin interface and look for the port forwarding settings. Add a new rule that forwards traffic on port 22 (the default SSH port) to your Pi's local IP address. Save the settings and you're good to go.
Securing Your Raspberry Pi for Public IP Access
Security should always be at the forefront of your mind when setting up public IP access. Here are a few tips to keep your Pi safe:
- Change Default SSH Port: Change the default SSH port from 22 to something less obvious to deter hackers.
- Use Strong Passwords: Make sure your Pi's password is strong and unique.
- Enable Firewall: Use a firewall to block unwanted traffic.
- Regular Updates: Keep your Pi's software up to date to patch any security vulnerabilities.
Advanced Security Tips
For extra security, consider setting up a VPN or using SSH keys instead of passwords. These methods provide an additional layer of protection and make it much harder for unauthorized users to gain access to your Pi.
Testing Your Public IP Setup
Once everything is set up, it's time to test your public IP access. Use a tool like WhatIsMyIP to find your public IP address. Then, try connecting to your Pi using an SSH client like PuTTY or Terminal. If everything is set up correctly, you should be able to connect without any issues.
Troubleshooting Tips
If you're having trouble connecting, here are a few things to check:
- Firewall Settings: Make sure your firewall isn't blocking the SSH port.
- Router Configuration: Double-check your port forwarding settings.
- IP Address: Ensure you're using the correct public IP address.
Using Dynamic DNS for Easier Access
Public IP addresses can change, which can make it tricky to connect to your Pi consistently. To solve this issue, you can use a Dynamic DNS (DDNS) service. These services provide you with a hostname that automatically updates when your IP address changes.
Setting Up DDNS
There are several DDNS providers to choose from, such as No-IP and DuckDNS. Follow their instructions to set up an account and configure your Pi to update the hostname automatically. Once set up, you can connect to your Pi using the hostname instead of the IP address.
Final Thoughts on Accessing Raspberry Pi with Public IP
Accessing your Raspberry Pi with a public IP might seem intimidating at first, but with the right steps, it's a breeze. By following the guidelines in this article, you can set up remote access to your Pi safely and securely.
Remember, security is key. Always take the necessary precautions to protect your Pi from unauthorized access. With the right setup, you'll have the freedom to manage your Pi from anywhere in the world.
So, what are you waiting for? Get out there and start tinkering! And don't forget to share your experiences in the comments below. We'd love to hear how you're using your Pi with public IP access.
Table of Contents
- Why Access Raspberry Pi with Public IP?
- Understanding Public IP and Raspberry Pi
- Setting Up Your Raspberry Pi for Public IP Access
- Configuring Your Router for Public IP Access
- Securing Your Raspberry Pi for Public IP Access
- Testing Your Public IP Setup
- Using Dynamic DNS for Easier Access
- Final Thoughts on Accessing Raspberry Pi with Public IP
Happy tinkering, and remember—technology is all about pushing boundaries and exploring new possibilities. Now go out there and show the world what you can do with your Raspberry Pi!

Detail Author:
- Name : Marjolaine Bins
- Username : rau.joy
- Email : lkeeling@hotmail.com
- Birthdate : 1992-11-28
- Address : 68965 Parker Rapid Suite 901 McClurefort, IN 64814
- Phone : +14847845628
- Company : Lakin and Sons
- Job : Material Movers
- Bio : Autem unde ipsa doloribus velit consequuntur sed. Voluptas eum explicabo mollitia ratione. Ipsum officiis quos et deserunt perferendis omnis ad. Officiis quasi ut ab qui ea.
Socials
tiktok:
- url : https://tiktok.com/@crystel_official
- username : crystel_official
- bio : Consequuntur nulla maxime iusto amet blanditiis.
- followers : 2540
- following : 2839
linkedin:
- url : https://linkedin.com/in/crystelrau
- username : crystelrau
- bio : Ut eveniet voluptatem est ut fuga est aliquid.
- followers : 5000
- following : 746
